
Beginner Tips for Composting at Home
Why Start Composting at Home?
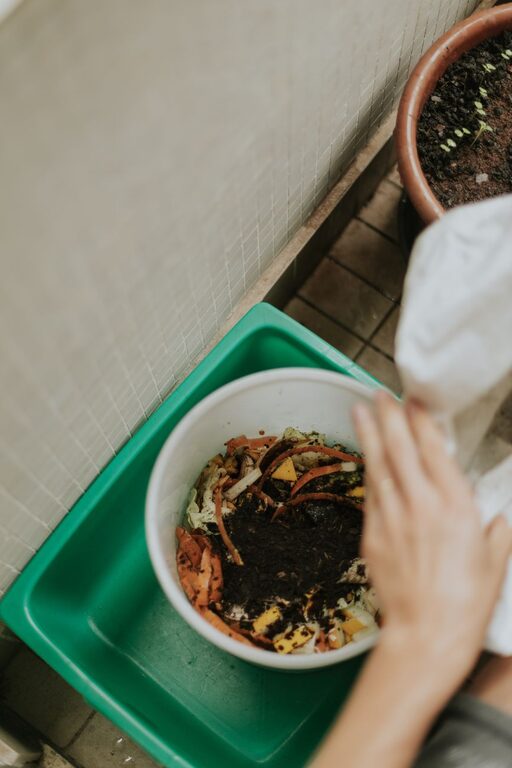
Composting is a simple way to recycle food scraps and yard waste while creating a useful soil amendment for plants. Instead of sending organic waste to the trash, you can let it break down naturally and use the finished compost in gardens, containers, lawns, or flower beds.
You do not need a large yard or special equipment to get started. A small outdoor bin, indoor collection container, or countertop composting system can work well, depending on your space and local services. The key is to begin with a manageable setup and learn as you go.
Choose the Right Composting Method
The best composting method depends on your available space, climate, and the type of materials you want to compost.
Outdoor compost bins
Outdoor bins are a popular choice for homes with yards. They can be purchased from garden centers or made from materials such as wood pallets or wire mesh. A covered bin helps keep the pile tidy and protects it from heavy rain.
Compost tumblers
Tumblers are raised containers that rotate, making it easier to mix the materials. They often produce compost more quickly than an open pile, but they may hold less material and can be more expensive.
Worm composting
Worm composting, also called vermicomposting, uses special worms to break down food scraps in a ventilated container. It works well for apartments, balconies, and small homes, but it requires a little extra care with moisture and food amounts.
Community composting
If you do not have space at home, look for a local compost collection service, community garden, or farmers market that accepts food scraps. This option allows you to compost without maintaining a bin yourself.
Learn the Difference Between Greens and Browns
A healthy compost pile needs a mix of “greens” and “browns.” These terms describe the general role materials play in the composting process.
Greens
Green materials are usually moist and rich in nitrogen. Common examples include:
- Fruit and vegetable scraps
- Coffee grounds and paper filters
- Fresh grass clippings
- Fresh plant trimmings
- Tea leaves and many plain tea bags
Browns
Brown materials are generally dry and rich in carbon. Examples include:
- Dry leaves
- Plain cardboard torn into small pieces
- Uncoated paper
- Small twigs and branches
- Untreated wood chips
- Straw and dried plant material
A common beginner mistake is adding too many food scraps without enough dry material. When this happens, the pile may become wet, compacted, or unpleasant. Add a layer of browns whenever you add a large amount of greens.
Start With a Simple Layering System
Place your compost bin on bare soil when possible. This allows helpful organisms, insects, and worms to move into the pile. If you must place the bin on concrete or another hard surface, composting can still work, but drainage and airflow become especially important.
Begin with a layer of coarse brown material, such as small twigs or dry leaves. Add a layer of green materials, followed by another layer of browns. Continue building the pile in a loose, balanced mix.
There is no need to measure every ingredient precisely. A useful general approach is to use more brown material than green material by volume. If the pile smells sour or looks soggy, add more browns. If it seems dry and decomposition has slowed, add a small amount of water or moist greens.
Keep the Moisture Level Balanced
Compost should be damp but not soaked. A good comparison is the moisture level of a wrung-out sponge.
If the pile is too dry, decomposition will slow down. Lightly sprinkle it with water while mixing in dry areas. If it is too wet, add dry leaves, shredded cardboard, or torn paper. Avoid adding large amounts of water all at once.
A covered bin can help control moisture during rainy weather. In dry climates, a lid or breathable cover can help prevent the pile from drying out too quickly.
Provide Air by Turning the Pile
Composting organisms need oxygen to work efficiently. Without enough air, the pile may become compacted and develop an unpleasant odor.
Use a garden fork, shovel, or compost aerator to turn the material every week or two. Move the outer materials toward the center and loosen any dense areas. You do not need to turn the pile constantly. Occasional mixing is usually enough for a small home compost bin.
Cutting large scraps into smaller pieces also improves airflow and helps them break down faster. For example, chop thick vegetable stems, tear cardboard, and break up large branches before adding them.
Know What to Add and What to Avoid
Most fruit and vegetable scraps, coffee grounds, yard waste, and plain paper products are suitable for a basic home compost pile.
For beginners, it is best to avoid meat, fish, bones, dairy products, oily foods, and large amounts of cooked food. These materials can attract animals, create odors, or break down slowly. Some advanced composting systems can handle them, but they require careful management.
Do not add pet waste, diseased plants, glossy paper, plastic, metal, glass, or plants treated with persistent chemicals. Also avoid weeds that have gone to seed unless your compost pile reaches and maintains a high enough temperature to destroy those seeds.
When in doubt, check the instructions for your composting system and local waste guidelines.
Watch for Common Compost Problems
Bad smells
A strong odor often means the pile is too wet, too compacted, or overloaded with green materials. Add dry browns and turn the pile to improve airflow.
Fruit flies
Fruit flies are attracted to exposed food scraps. Bury fresh scraps under a layer of browns, cover them with finished compost, or use a container with a secure lid.
The pile is not breaking down
A dry pile, large pieces, or cold weather can slow decomposition. Add moisture, mix the contents, and cut materials into smaller pieces. Composting naturally takes longer during cooler seasons.
The pile is too wet
Add shredded cardboard, dry leaves, or straw, then turn the pile. If the bin has no drainage, check that excess water can escape.
Know When Your Compost Is Ready
Finished compost is dark, crumbly, and earthy-smelling. Most of the original materials should no longer be recognizable, although small twigs or eggshell pieces may remain.
Depending on the materials, bin size, temperature, and how often you turn it, compost may take several months or longer to finish. If you are unsure, let it continue breaking down. Mature compost is gentle enough to mix into garden soil without overwhelming plants.
Use finished compost as a thin layer around plants, mix it into garden beds, or blend a small amount into potting soil. Avoid planting directly into pure compost, since it may hold too much moisture or lack the structure plants need.
Make Composting an Easy Habit
The easiest way to stay consistent is to keep a small container near your kitchen food preparation area. Empty it into your outdoor bin regularly so scraps do not sit indoors for too long.
Keep a supply of dry leaves, shredded cardboard, or plain paper nearby. Having brown materials ready makes it easier to maintain balance. Start with small amounts, observe how your pile responds, and make gradual adjustments.
Composting does not need to be perfect. With the right mix of materials, reasonable moisture, and occasional turning, your household waste can become a valuable resource for healthier soil and a more sustainable home routine.